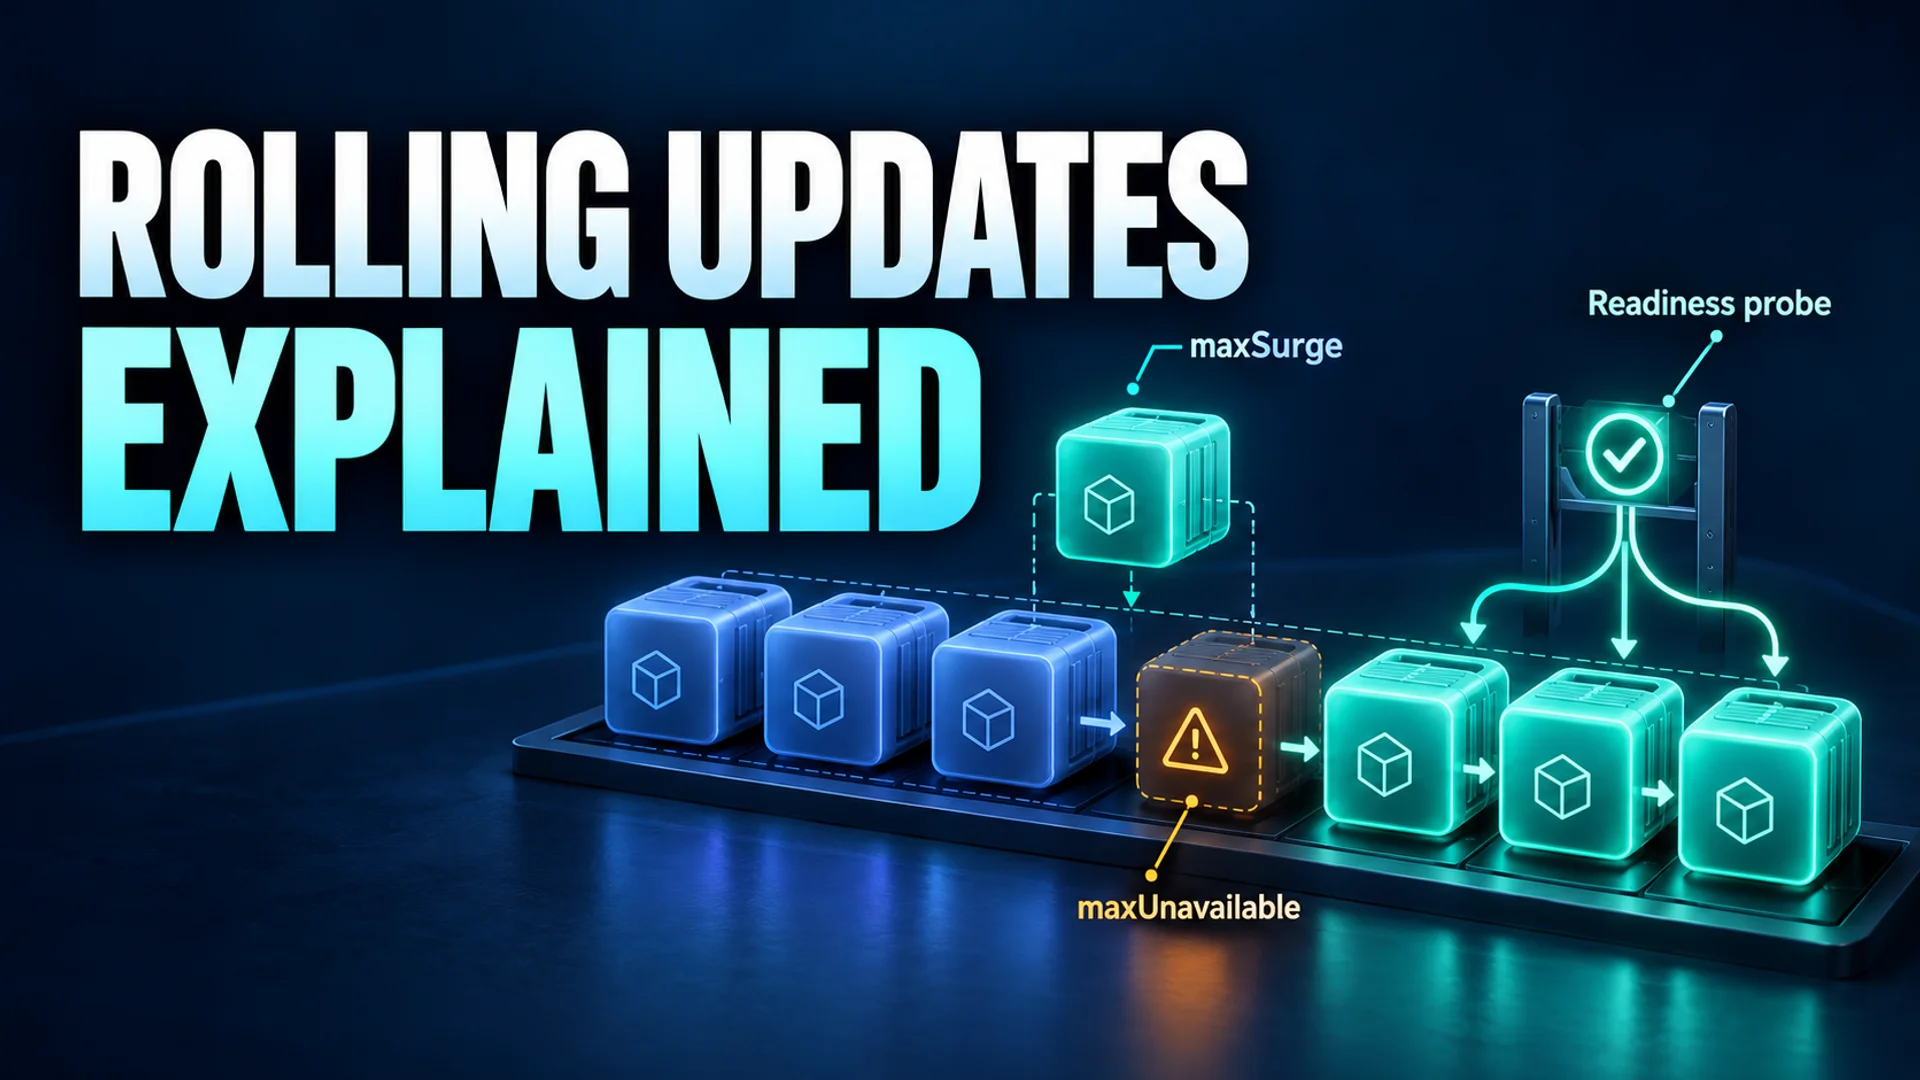
You've likely experienced user sessions being dropped or requests failing with 500 errors when restarting a server. In cloud-native environments, service availability is not just a feature but a metric directly tied to business survival. However, many developers and operators experience unintended service outages or overloads due to subtle differences in Deployment configurations.
This article takes a deep dive into the rolling update mechanism of Kubernetes Deployments and provides a hands-on guide to achieving zero-downtime deployments by correctly configuring maxSurge, maxUnavailable, and readinessProbe. Beyond merely listing theoretical definitions, we will understand why these settings are necessary and what issues arise when they are misconfigured through specific scenarios.
The Essence and Basic Structure of Rolling Updates
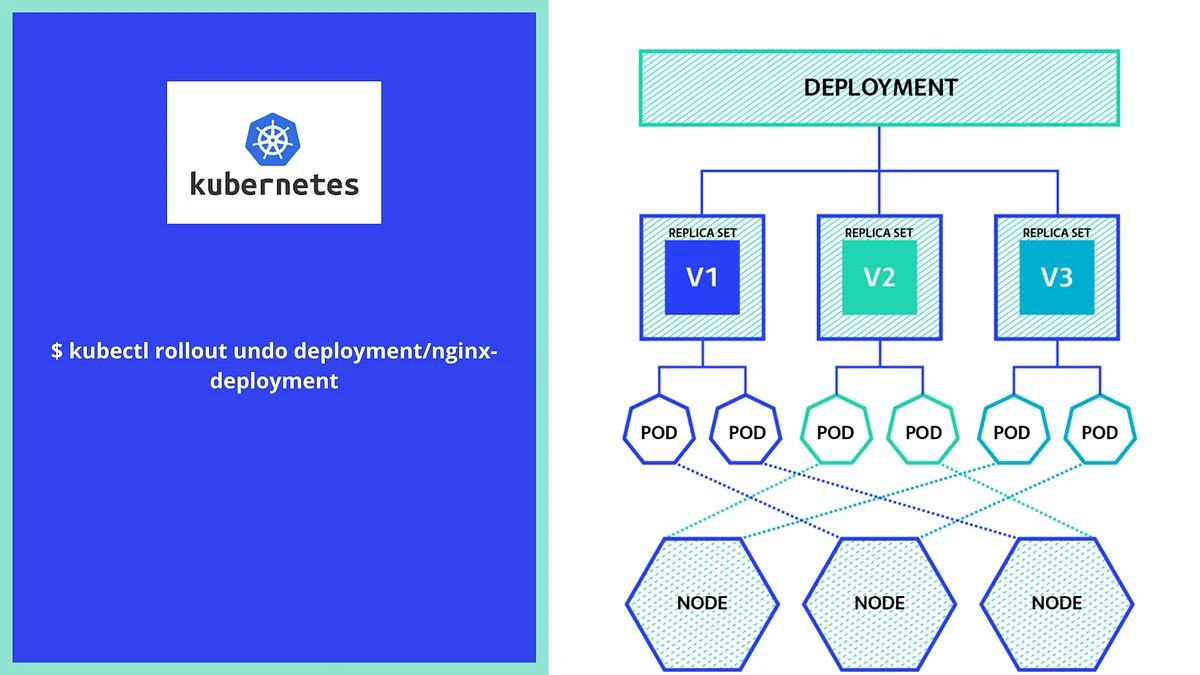
The Kubernetes Deployment is a core resource for managing stateless applications. Going beyond simply scaling pods up and down, it carefully orchestrates ReplicaSets and Pods to realize the 'Desired State' declared by the user.
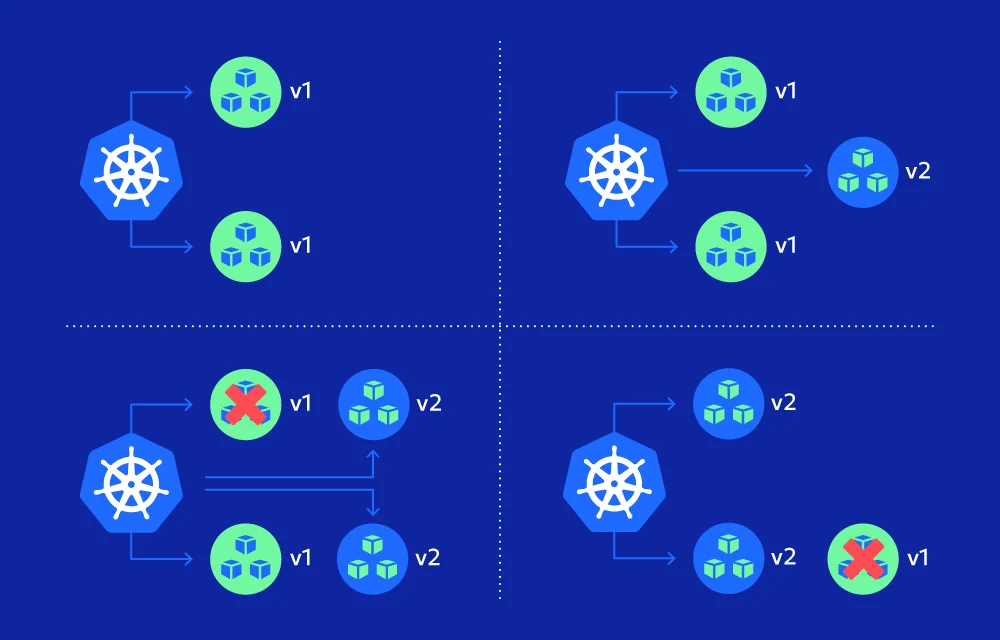
Many beginners misunderstand rolling updates. A rolling update is not simply 'starting new pods first.' It is a sophisticated process that determines 'how many' and 'how fast' pods are replaced through two levers: maxSurge and maxUnavailable. If this balance is disrupted, resources may be exhausted, or the service may become temporarily unstable.
The Deployment Controller distinguishes each ReplicaSet using the pod-template-hash label. Since this hash matches the content of the Pod template, a new rollout is triggered only when there are substantial changes to the PodTemplateSpec, such as changes to the image version or environment variables. This serves as a safeguard against unintended recreations caused by unnecessary label changes.
Balancing maxSurge and maxUnavailable
The settings that cause the most confusion are maxSurge and maxUnavailable. These values can be set as numbers or percentages and determine the trade-off between update speed and resource usage.
maxSurge refers to the number of additional pods that can be created above the existing number of pods (replicas) during an update. Think of this as an 'additional pod budget.' For example, if replicas are 5 and maxSurge is 1, up to 6 pods can exist during the update. Importantly, the actual total number of pods may temporarily exceed this value due to the resources of pods that are being newly created or are already terminating but have not yet completely disappeared. This is due to subtle timing differences between resource reclamation and creation.
Conversely, maxUnavailable means the maximum number of 'unavailable' pods allowed during an update. Many people misunderstand maxUnavailable=0 as 'not terminating any pods.' Strictly speaking, maxUnavailable=0 means ensuring that the number of available pods does not drop below the specified replicas count during the update process. Once a new pod is ready and becomes Available, only then is one existing pod terminated. In other words, once a new pod becomes available, the old pod is terminated.
The YAML example below clearly illustrates this logic. You must adjust these values according to the criticality of your service and the availability of resources.
apiVersion: apps/v1
kind: Deployment
metadata:
  name: my-app-deployment
  annotations:
    kubernetes.io/change-cause: "Initial deployment v1.0"
spec:
  replicas: 5
  revisionHistoryLimit: 10
  strategy:
    type: RollingUpdate
    rollingUpdate:
      maxSurge: 1
      maxUnavailable: 0
  selector:
    matchLabels:
      app: my-app
  template:
    metadata:
      labels:
        app: my-app
    spec:
      containers:
      - name: my-app-container
        image: my-app:v1.0
        ports:
        - containerPort: 8080
        readinessProbe:
          httpGet:
            path: /healthz
            port: 8080
          initialDelaySeconds: 5
          periodSeconds: 10
        resources:
          requests:
            cpu: "100m"
            memory: "128Mi"
          limits:
            cpu: "200m"
            memory: "256Mi"
In the example above, maxUnavailable: 0 means "zero unavailable pods allowed during updates." This setting is suitable for services requiring high availability, but new pods can be started immediately only if the cluster has sufficient spare resources. If resources are insufficient, new pods will remain in the Pending state, potentially delaying the rollout.
Safe Traffic Shifting via readinessProbe
Even after new pods are created, it may take some time for the application to become fully ready. If traffic enters at this point, errors may occur. This is precisely what readinessProbe prevents.
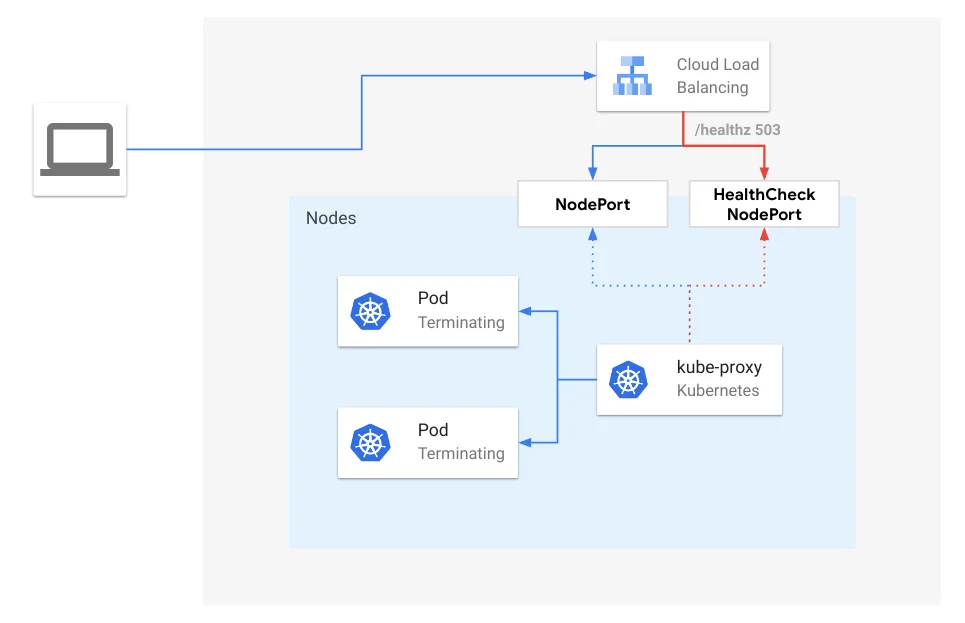
readinessProbe is a probe that checks whether a pod is ready to receive traffic. Kubernetes does not register the pod's IP in the Service endpoint until this probe succeeds. Therefore, load balancers or service meshes do not send traffic to new pods until they have completed initialization tasks, such as application logic setup and database connections, and are returning responses.
As seen in the YAML above, a readinessProbe is configured to send HTTP GET requests to the /healthz path. If the request succeeds, the pod is considered Available. Note that livenessProbe checks if the container is alive and restarts it if dead, so it has less direct relevance to traffic control during rolling updates. Therefore, for minimal examples of zero-downtime deployments, focusing on readinessProbe is key. Image tags, port numbers, health check paths, and resource values must always be adjusted to match the actual service.
Detecting Issues and Rollback Strategies
Not all deployments will go smoothly. Due to incorrect images or configuration errors, new pods may continuously enter the CrashLoopBackOff state. In such cases, Kubernetes reports the detection status of the issue through progressDeadlineSeconds.
progressDeadlineSeconds is based on the time elapsed without rollout progress. If no progress is made after this time, the Deployment status becomes Progressing=False, and the reason is reported as ProgressDeadlineExceeded. Importantly, at this stage, the Kubernetes controller only detects the issue and changes the status; it does not automatically roll back to the previous version. The controller continues to attempt restarts, but recovery may not occur without user intervention.
To track deployment history, you can set revisionHistoryLimit, which defaults to 10. If this value is small, rollback history may be deleted quickly, so it is generally common to maintain or increase it. Additionally, instead of the deprecated --record flag, use the kubernetes.io/change-cause annotation to leave a record of the reason for changes during deployment.
Useful Management Commands
Here is a summary of commands frequently used in practice.
- Apply Deployment:
bash
kubectl apply -f deployment.yaml - Monitor Rollout Status:
bash
kubectl rollout status deployment/my-app-deployment - Check Deployment History:
bash
kubectl rollout history deployment/my-app-deployment - Rollback to a Specific Version:
bash
kubectl rollout undo deployment/my-app-deployment --to-revision=2
You should be able to combine these commands to observe the deployment process in real-time and respond immediately when issues arise.
Conclusion
Zero-downtime deployments do not happen like magic; they are based on a balanced configuration of maxSurge and maxUnavailable, and the accurate behavior of readinessProbe. Without strategic configuration that considers resource budgets, clusters waste resources, or services experience interruptions. Based on the configuration points discussed today, check the Deployment settings of your currently running services. Small configuration changes can significantly enhance system stability.
What criteria do you use to set the maxUnavailable value for your services?
References
- Kubernetes Official Documentation: Probes · kubernetes.io
- 디플로이먼트 | Kubernetes · kubernetes.io